Introduction
This post describes the difference between Project Purchase Orders and normal Purchase Orders. Both can be used to buy items for a Project and both to generate Item Transactions on a Project, but nevertheless there are some major differences between both, mainly in the logistic flow.
Project Purchase Orders
A Project Purchase Order can be created directly from the Project form: click Project>Projects>Item task button>Purchase Order.
On Project Purchase Orders, the project number is populated. This seems a minor difference, however a lot of other consequences are triggered by this fact.
The issue inventory transaction generated for a Project Purchase Order is a virtual inventory transaction (Reference is Transaction).
It means the item never arrives in stock. This has import consequences:
- The item cannot be used in Shipment functionality. As it never arrives in stock upon posting the purchase packing slip, it cannot be added to a Shipment.
- The item ordered with a Project Purchase Order will never cover a requirement. So if you have a project item requirement and you create a project purchase order for it, the MRP run will still propose a planned purchase order for the item.
These are major disadvantages of using Project Purchase Orders. Nevertheless there are some advantages of using them:
- The project number allows for easy filtering. Also it is clear for the purchase department for which project the purchase order is intended.
- Upon posting the purchase packing slip, the item consumption is automatic: no need to post a separate transaction to have the item consumption on the project.
Purchase orders
Another way of buying items for a specific project, is using ‘normal’ Purchase Orders.
You can create a ‘normal’ Purchase order from your project item requirement by clicking the Functions button > Create Purchase Order.
A second way is to run the MRP, which will generate a Planned Purchase Order for your project item requirement. You can Firm this Planned Purchase Order into a ‘normal’ Purchase Order. Just make sure you have marking activated during firming.
Both generate a ‘normal’ Purchase Order which is marked to your project item requirement.
This has some advantages compared to a Project Purchase Order:
- No virtual transactions are generated for such a Purchase Order. The item arrives in stock upon posting the purchase packing slip. As such the item can be used in Shipment functionality.
- The Purchase Order will be seen by MRP as a coverage for your project item requirement, avoiding generation of a new Planned Purchase Order. Important to notice here is the condition: it is the Marking which should be activated upon firming.
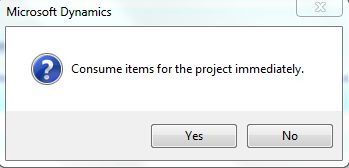
- Still, the item consumption on the project can be done rather automatic: upon posting the purchase packing slip, a question will be popped up asking if the consumption should be booked right away on the project.

Important –again- to notice here is that Marking should be activated upon firming.
Minor disadvantage here:
- Project number is not populated on such ‘normal’ Purchase Orders, so it is less clear for the purchase department to which project the Purchase Order belongs to. Some minor modifications (a new custom field which stores the ProjId) can solve this issue easily.
Continue reading......


