Publish data sources
You need the define which data sources from Dynamics AX, users are allowed to use in Office.
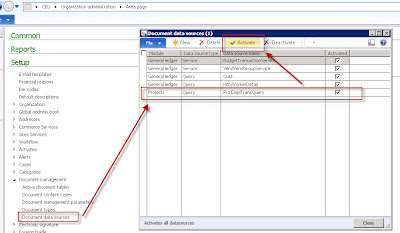
- Go to Organization administration > Setup > Document management > Document data sources.
- Add the data source you want to use.
- Activate the data source by using the Activate button.
Connecting to the AOS
Next, you need to define where to fetch the data from in Word, it is from which AOS. If there are multiple AOS instances, like for example a test, development, … environment, follow these steps:
- Open Word, go to the Dynamics AX tab and click the Connection button. Open the Advanced section and fill out the Server and Port.
- Choose the Legal Entity from which data should be retrieved.
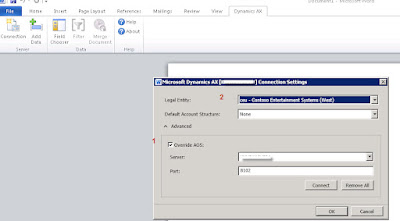
If you don’t know the Server and Port name, just find the configuration file you are using to start up Dynamics AX. Open it with Notepad and look for following information:
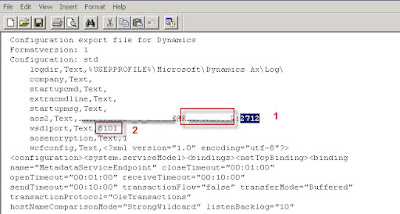
Remark 1= after the @ sign, you can find the AOS instance name. Remark 2 = the Port, so don’t fill out the Port you find after the : sign on the aos2 lign.
Design the Word document
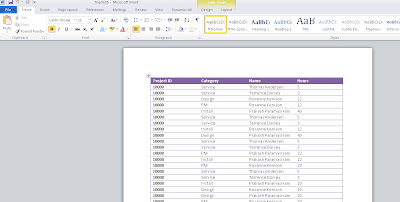
In this example I’ll add a table to my Word document for repeating values of my ProjEmplTransQuery data source, to show hour transactions for a Project.
Next, go to the Dynamics AX tab and choose Add Data. Select the ProjEmplTransQuery data source and hit OK.
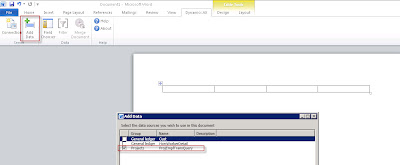
To the right, you’ll notice the fields of the chosen data source. As you can notice, if you add related tables to your data source, you can pick fields from multiple tables. Drag and drop the fields you want in your report in the columns of the Word table. If you drop them in the second row, automatically a header row will be created.
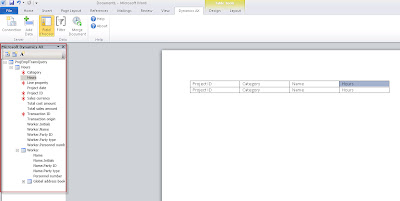
You can add whatever Word formatting style you like to your table, to make it look nice.
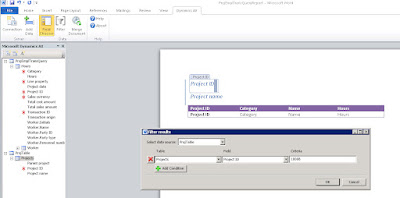
Maybe it would be great to add a filter to the retrieved data, for example only for a specific project number:
- Go to the Dynamics AX tab.
- Choose Filter.
- Add the appropriate filters.
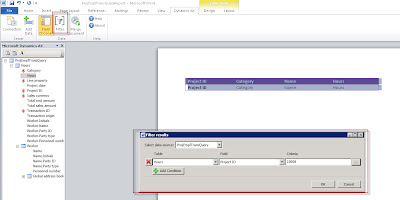
Next, save the Word document.
Generating the report
- Open the saved Word document.
- Go to the Dynamics AX tab.
- Choose Merge Document.
Adding additional data
Another data source could be connected to the same Word document. In my example below, I’ve added the ProjTable data source. I use this data source to put some fields on my report, so no repeating table. To make sure, the fields are filtered the same way my rows in my table are (for the same project), I should add the same filter to my second data source:
Rerun the report:
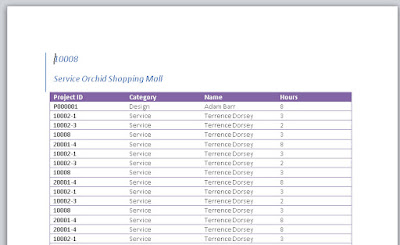
A remark: apparently, fields added a such to the Header or Footer of a Word document aren’t replaced by the Merge action. Just a pity, but apparently it ain’t working…
Add the Word template to Dynamics AX
- Remove the Filter from the Word document and save it.
- Upload your Word document to a SharePoint library.
- Go to Organization administration > Setup > Document management > Document types. Create a new Type and choose as Class Template library. Fill out the url of the SharePoint library to which you’ve uploaded the Word template in the field Document library. Activate it.
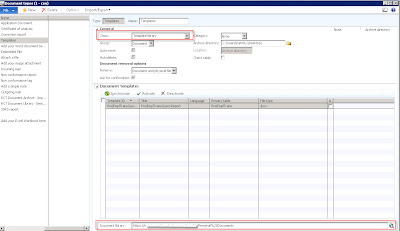
Once activated, each form containing a reference to the Primary table, will be able to generate the document. This is a problem as our Primary table currently is the ProjEmplTrans table. However, the ProjTable was included in our document aswell, so I would like to make this the Primary table. To do so, open the Word document, right click the ProjTable node, choose Properties and check the Use as primary query checkbox.
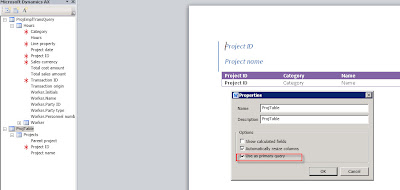
Remove the ProjEmplTransQuery anyway: it won’t filter on Project-Id as it ain’t the primary query.
Re-upload your Word document to the SharePoint library and Synchronize the Document Type in AX with the library. Now the Primary table is ProjTable for this Word document.
Add the generate from template buttons
To be able to generate the document, some buttons should be added. The CustTable form has already the necessary buttons, so it is easiest to just copy it from there and paste it to your target form, in this example the ProjTable form:
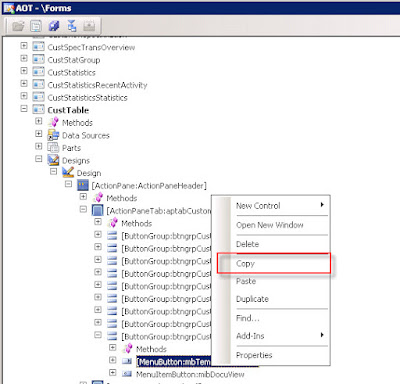
Some methods should be added on your target form, being classDeclaration:
// classDeclaration
class FormRun extends ObjectRun
{
    …
    // BGN Office Add-ins

    boolean isDocuActionTemplate;
    // END Office Add-ins
}
The init method:
void init()
{
    …
    super()
    // BGN Office Add-ins
    isDocuActionTemplate =
        DocuActionForTemplate::createTemplateOnMenuButton(
                    mbTemplatesButton, projTable.TableId);
    …
    // END Office Add-ins

}
The run method:
public void run()
{
    …
    docuActionTemplateUndefined.visible(
                 !isDocuActionTemplate);
}
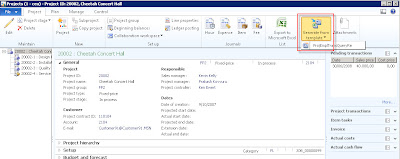
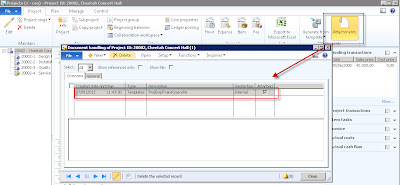
Now we can generate the document with as Filter the Project Id from the record selected in the Form. The document is generated and automatically attached to the record in the form:
